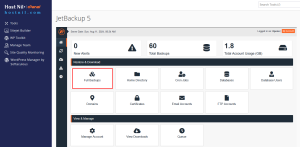
JetBackup provides cPanel Hosting’s backup. Once you open JetBackup, you will be greeted with the JetBackup interface and dashboard. The dashboard shows an overview of statistics, alerts, and recent JetBackup activities associated with your account.

Full Backups: Full cPanel backup can be restored using this option. All the websites in cPanel will be backed up and restored.
Home Directory: You can restore the backup of any folder or file in cPanel if desired. If only one site needs to be restored, select the folder.
Databases: If you restore a site’s backup, you must also restore its database. This option can be used to restore any database.
Database Users: You can manage database user backups
Domains: You can restore the backup of any website in cPanel
Email Accounts: You can restore all webmail.
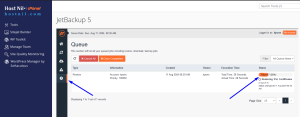
Queue: Backups are stored on multiple other servers. It will take time to download or restore them. Here, you can see how long the process will take or how much % is downloaded.
Downloads: You can download the backup. Completed downloads are stored in the Downloads Directory. The Direct Download button in the far right column will download the .tar.gz file to your file manager. Downloads are created with the following format: download_XXX_XXX.tar.gz
Restore and Download Buttons #
Restore: Restore selected backups and add them to the Queue. In this step, you can remove backup items from the Restore. If you’d like to remove a backup item from the Restore, click “Remove items” under the category to remove it from the Restore.
Download: Download selected backups and add them to the Queue. In this step, you can remove backup items from the Download. If you’d like to remove a backup item from the download, click “Remove items” under the category to remove it from the Download.

Restore Full Account Backup #
Go to your Hosting Control Panel > JetBackup > Click “Full Backups” Option

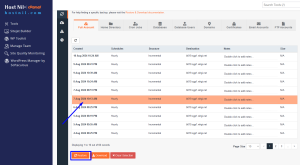
They are all backup files by date and time. Select your backup date and click the “Restore” button.

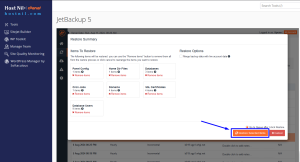
Now, there is an open Restore Summary dialog popup. Click the “Restore Selected Items” button.

Restore will be started shortly. You see the progress in the “Queue” option

If you have any problems, please contact us. We will be happy to assess you.


